Procreate is a wonderful design program for home decor and furniture design. One of the features that we love is the feature to cut out the background by erasing it.
In Procreate, the easiest way to cut out the background is to use the eraser to erase off and cut out the background you do not want. When erasing the background, crop the image as close as possible so you have less background to erase; then, you can start to erase the background you do not want by using the eraser mode on Procreate.
Table of Contents
- Mastering Background Removal in Procreate: A Step-by-Step Guide
- Unlocking Digital Creativity: 10 Reasons Procreate Shines as an iPad Design Tool.
- Frequently Asked Questions
- Related Questions
Cutting out a background in Procreate by erasing it is quite easy. You need to follow a few simple steps to erase an experience. You can use the erase function to erase almost anything on your Procreate layer. We use the erase function to erase or cut out a background in a photo.
You can watch our video to see how we cut out a background using Procreate:

Mastering Background Removal in Procreate: A Step-by-Step Guide
Removing the background from a photo can significantly enhance its impact, and Procreate offers a seamless way to achieve this. Whether you’re a graphic designer, artist, or photo editing enthusiast, understanding how to erase backgrounds in Procreate effectively is a valuable skill.
We will walk you through the essential steps to efficiently remove backgrounds from photos within the Procreate app. This process helps create cleaner, more professional-looking images and lays the foundation for more complex editing tasks.
Let’s dive into the world of Procreate and unlock the potential of your digital artwork by mastering the art of background removal. Here are the steps to erase a background on a photo in Procreate:
Crop the Image
The first thing we do is crop the image. We crop the image because you want to have as little background as possible to erase it.
We try to crop the image as close to what we need. This allows us to ensure that we have less background to erase.
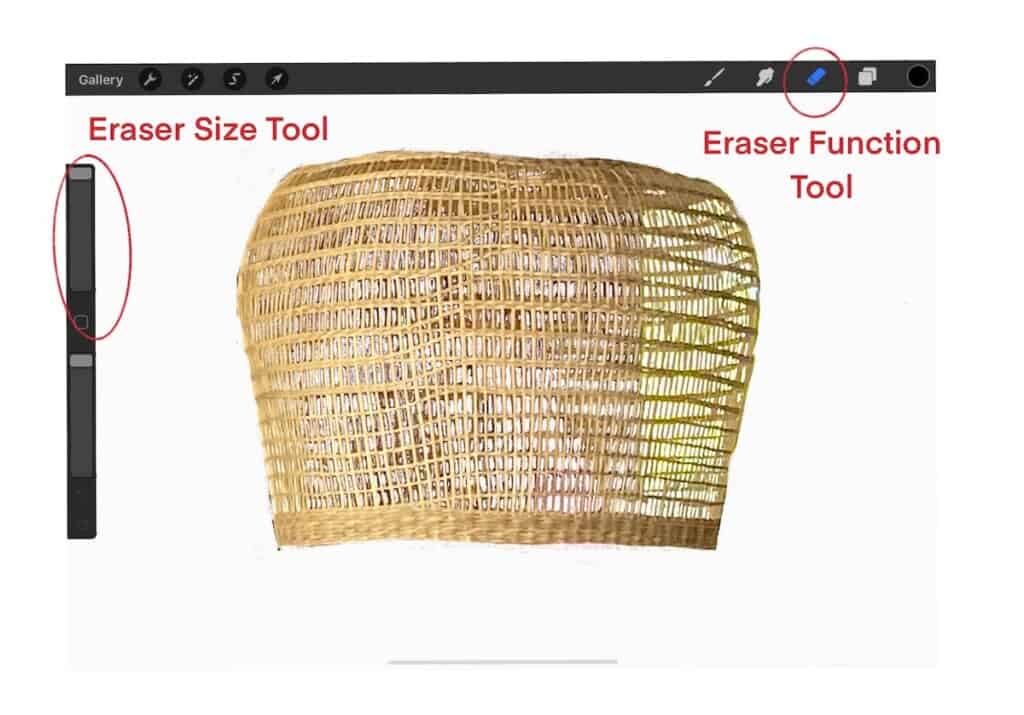
Switch Procreate to the Erase Function
Procreate has an erase function so that you can erase on Procreate. You will see an erase icon at the top right-hand side of Procreate. It would help if you pressed that on so that Procreate will be in the erase function mode.
The Procreate erase function is similar to using a regular eraser on paper. The only difference is that the eraser is on your iPad, and you are using your Apple Pen to erase what needs to be erased.
On the left-hand side of the Procreate is the eraser function key. You can set what size you want the eraser to be as you erase the background. You can set this on the left-hand side of your canvas, the same way you will change the setting on a pencil or brush in Procreate.
Once you have completed these basic settings in Procreate, you are now ready to erase your background or anything else you want to erase on your Procreate canvas.
Start To Erase the Larger Areas First
I will start to erase the larger areas first. I do that because I want to get off as much of the background as possible. I usually set my erase at a larger setting to erase the larger background.
Sometimes, with the erase function, it may not get the background completely clean, so I have found that I often need to go over the background with the eraser a few times and in a few directions to ensure the background area is clean.
If you do not need it to be clean, you can stop this step and erase it as much as needed.
Feel free to adjust the size of the eraser as you need to. One of the great things about Procreate is that it is straightforward to adjust the eraser’s size as needed.
Use a Smaller Eraser Size to Obtain Fine Detail
Once I have erased all the larger areas that I can, the larger-sized eraser can use a smaller eraser to erase in finer detail. When I am erasing in the finer details, here are a few things I will do:
- Use my two fingers to enlarge the image – I will use my two fingers to enlarge the canvas image. This is as you will do on your iPad to enlarge something. This allows me to see all the fine details of the image I want to erase.
- Get as close to the image as possible – I will try to get as close to the image as possible with my fine eraser tip. The only way to do this is to bring the image in as large as possible and then use your eraser pencil to erase as close as you can to the image.
How to Use The Erased Background Images
Once the background has been erased from the image, you can decide the best way to use it. We use the erased image in a lot of different ways.
- Color background – Now that the background is erased, you can add another color to the image background. You can do this by dragging and dropping the color on the background layer.
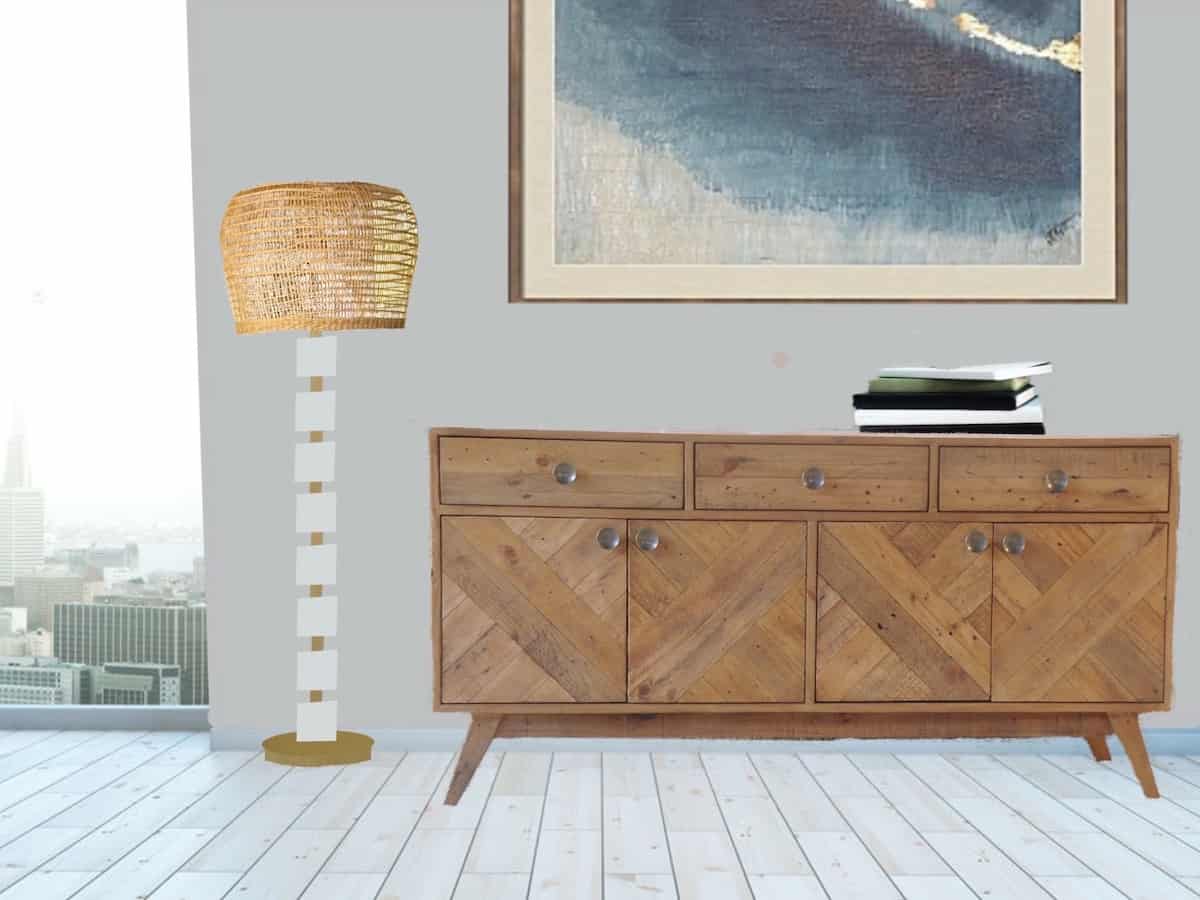
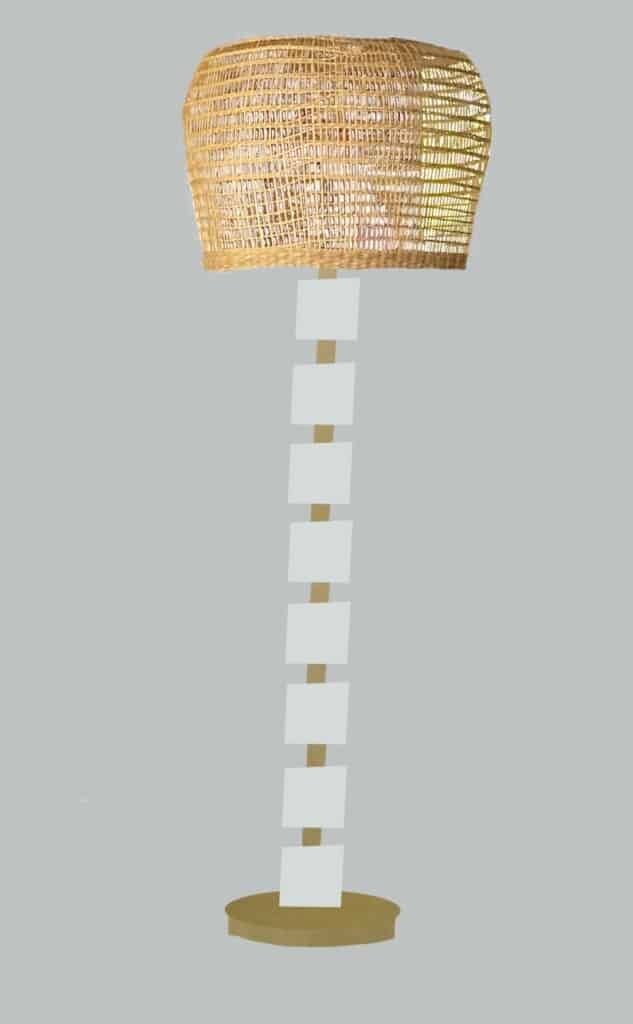
- Add to another background- We used our erased images to add to another background. For example, in our video, we show we have added this woven shade, which we eventually added to a lamp base.
The eraser function on Procreate makes cutting out any background you may not want on your Procreate image or canvas easy. We often use this function in our home decor and home furniture product design.
Unlocking Digital Creativity: 10 Reasons Procreate Shines as an iPad Design Tool.
In the vast realm of digital design and artistry, few tools have made as significant an impact in recent years as Procreate for the iPad. While numerous digital design programs are available, Procreate is a paragon of innovation and usability.
Whether you’re a professional artist, an enthusiastic hobbyist, or someone just venturing into digital creation, here are ten compelling reasons to consider Procreate:
- Intuitive Interface: Procreate boasts a user-friendly interface that is both sleek and straightforward, making it accessible even for those new to digital art.
- Impressive Brush Library: With many brushes available and the ability to customize or create your own, artists can achieve a vast range of textures and effects.
- High-Resolution Canvases: Procreate supports ultra-high-definition canvases, allowing for detailed artwork that can be printed at large scales without losing clarity.
- Time-lapse Recording: Every stroke made in Procreate is automatically recorded. Artists can playback their creation process as a time-lapse, making it fantastic for demonstrations or learning.
- Optimized for Apple Pencil: Procreate is finely tuned to work seamlessly with the Apple Pencil, ensuring precision, responsiveness, and capturing the nuances of pressure and tilt perfectly.
- Powerful Layering: With advanced layering options, including blending modes and masking capabilities, artists can easily manage complex compositions.
- Live Symmetry: The symmetry feature allows for real-time mirrored drawing, making it invaluable for creating balanced designs and patterns.
- QuickShape Feature: Turn rough sketches into perfect shapes with the QuickShape tool, which refines drawn shapes (like circles, triangles, and squares) in real time.
- Regular Updates: The Procreate team is dedicated to innovation, frequently rolling out updates with new features, brushes, and refinements based on user feedback.
- Affordable Pricing: Compared to many professional design software options, Procreate offers a one-time purchase fee that is quite affordable, giving artists access to a suite of top-tier design tools without a recurring subscription.
In the evolving digital design landscape, Procreate emerges as a beacon for both budding and seasoned artists. With its rich features, continual improvements, and commitment to user satisfaction,
it’s no wonder Procreate holds a revered spot in the heart of the digital art community. Dive in, and unleash your creativity with this exceptional iPad design tool!
Find out more about how Mondoro can help you create, develop, and manufacture excellent home decor and furniture products – don’t hesitate to contact me, Anita. Check out my email by clicking here or become a part of our community and join our newsletter by clicking here.
Mondoro gives out a FREE Lookbook to anyone interested. You can receive a copy of our latest Lookbook by clicking here.
Listen to our Podcast called Global Trade Gal. You can find it on all major podcast platforms. Try out listening to one of our podcasts by clicking here.
Subscribe to our Mondoro Company Limited YouTube Channel filled with great videos and information by clicking here.
Frequently Asked Questions
How do I erase around a shape in Procreate?
To erase around a shape in Procreate, you can use the Eraser tool and manually erase the areas outside the shape.
Can I cut out an object in Procreate?
While Procreate does not have a dedicated “cut out” tool, you can achieve a similar effect by using selection tools to isolate the object and then delete or erase the surrounding areas.
Is there a way to feather or soften the edges of a cut-out shape in Procreate?
Yes, in Procreate, you can soften the edges of a cut-out shape by using the Gaussian Blur or Motion Blur filters. Apply the desired blur effect to the edges of the cut-out shape to create a feathered or softened look.
Can I create a precise and clean cut-out of complex shapes in Procreate?
Yes, Procreate offers various selection tools like the QuickShape feature, which can help create precise and clean cut-outs of complex shapes. Additionally, utilizing Zoom and taking your time can contribute to more accurate results.
Are there any specific brush settings or techniques to improve the precision of erasing or cutting out in Procreate?
Using a smaller brush size, adjusting the opacity and flow settings, and zooming in for more precise control can help improve the precision when erasing or cutting out in Procreate.
Can I change the position of a cut-out image in Procreate?
Yes, you can easily move a cut-out image in Procreate by using the Transform tool. Select the image layer, tap on the Transform tool, and then use gestures or the on-screen controls to reposition the image.
Related Questions
Can You Design Home Decor Products With Procreate?
Procreate is a straightforward design program to learn that has a lot of great design functions. Procreate can save you time and money for your home decor and furniture product design needs. It will also allow you to set up trend colors in your design palettes so you can easily find them again. You can easily make repeat patterns and use the clipping mask function to get a design that looks close to the finished product.
To find out more about Procreate and Home Decor design, you can read our blog on Using Procreate In Designing Home Decor Products – Why We Love It! by clicking here.
How Do You Use The Clipping Mask Function in Procreate?
The clipping mask function in Procreate allows the top layer to be clipped or cut to the same size and shape as the bottom layer. This clipping mask function lets you see how a product will look with a specific finish when completed. The first thing you must do is make sure the photo or file you import is prepared properly. Then you must complete the actual product design while being sure to layer and fill in each layer with color. Once the Procreate design is completed, you are ready to do the clipping mask and to clip the top layer to the bottom layer.
We love the clipping mask function and use it a lot in our home decor and furniture designs. You can find out more about using the clipping mask function in Procreate by reading our blog 4 Easy Steps to Using the Clipping Mask Function in Procreate by clicking here.