When you were using Procreate it may be a bit confusing to know exactly how you use the color picker or the eyedropper tool in Procreate to pick a color that you want to use. Once you know how to use these simple tools in Procreate, it will be easy for you to find the colors you need.
Using the picker or eyedropper tool in Procreate requires six easy steps 1) locate the color picker or eyedropper tool, 2) use your fingers to pick the colors, 3) move your fingers around the canvas, 4) keep your eye on the color picker circle, so you know what color you are picking, 5) add your color to a palette, and 6) see the color values if you follow these six simple and easy tips to find a color with the Procreate tool that will help you to find the right colors. You will also find it a straightforward tool to work with.
Table of Contents
- 6 Easy Tips For Using The Color Picker or Eyedropper Tools in Procreate
- Tip 1: Locate the Color Picker or Eye Dropper Tool
- Tip 2: Use Your Finger To Pick The Color
- Tip 3: Move your Finger Around the Canvas to Find the Exact Color
- Tip 4: Keep Your Eye on the Circle and The Top Corner
- Tip 5: Add The Color You Picked to a Palette
- Tip 6: You Can See All The Color Values In Procreate
- Related Questions
6 Easy Tips For Using The Color Picker or Eyedropper Tools in Procreate
Are you creating artwork or designs in Procreate and need to use accurate colors? If so, then using the Color Picker tool and Eyedropper tools is a must!
But what do these tools actually do, and how can you best use them in your workflow?
Read on to explore the color picker & eyedropper tools in Procreate, with 6 easy tips on how you can use both of these features to make sure that your colors look perfect every time.
Alright, let’s get started!
Tip 1: Locate the Color Picker or Eye Dropper Tool
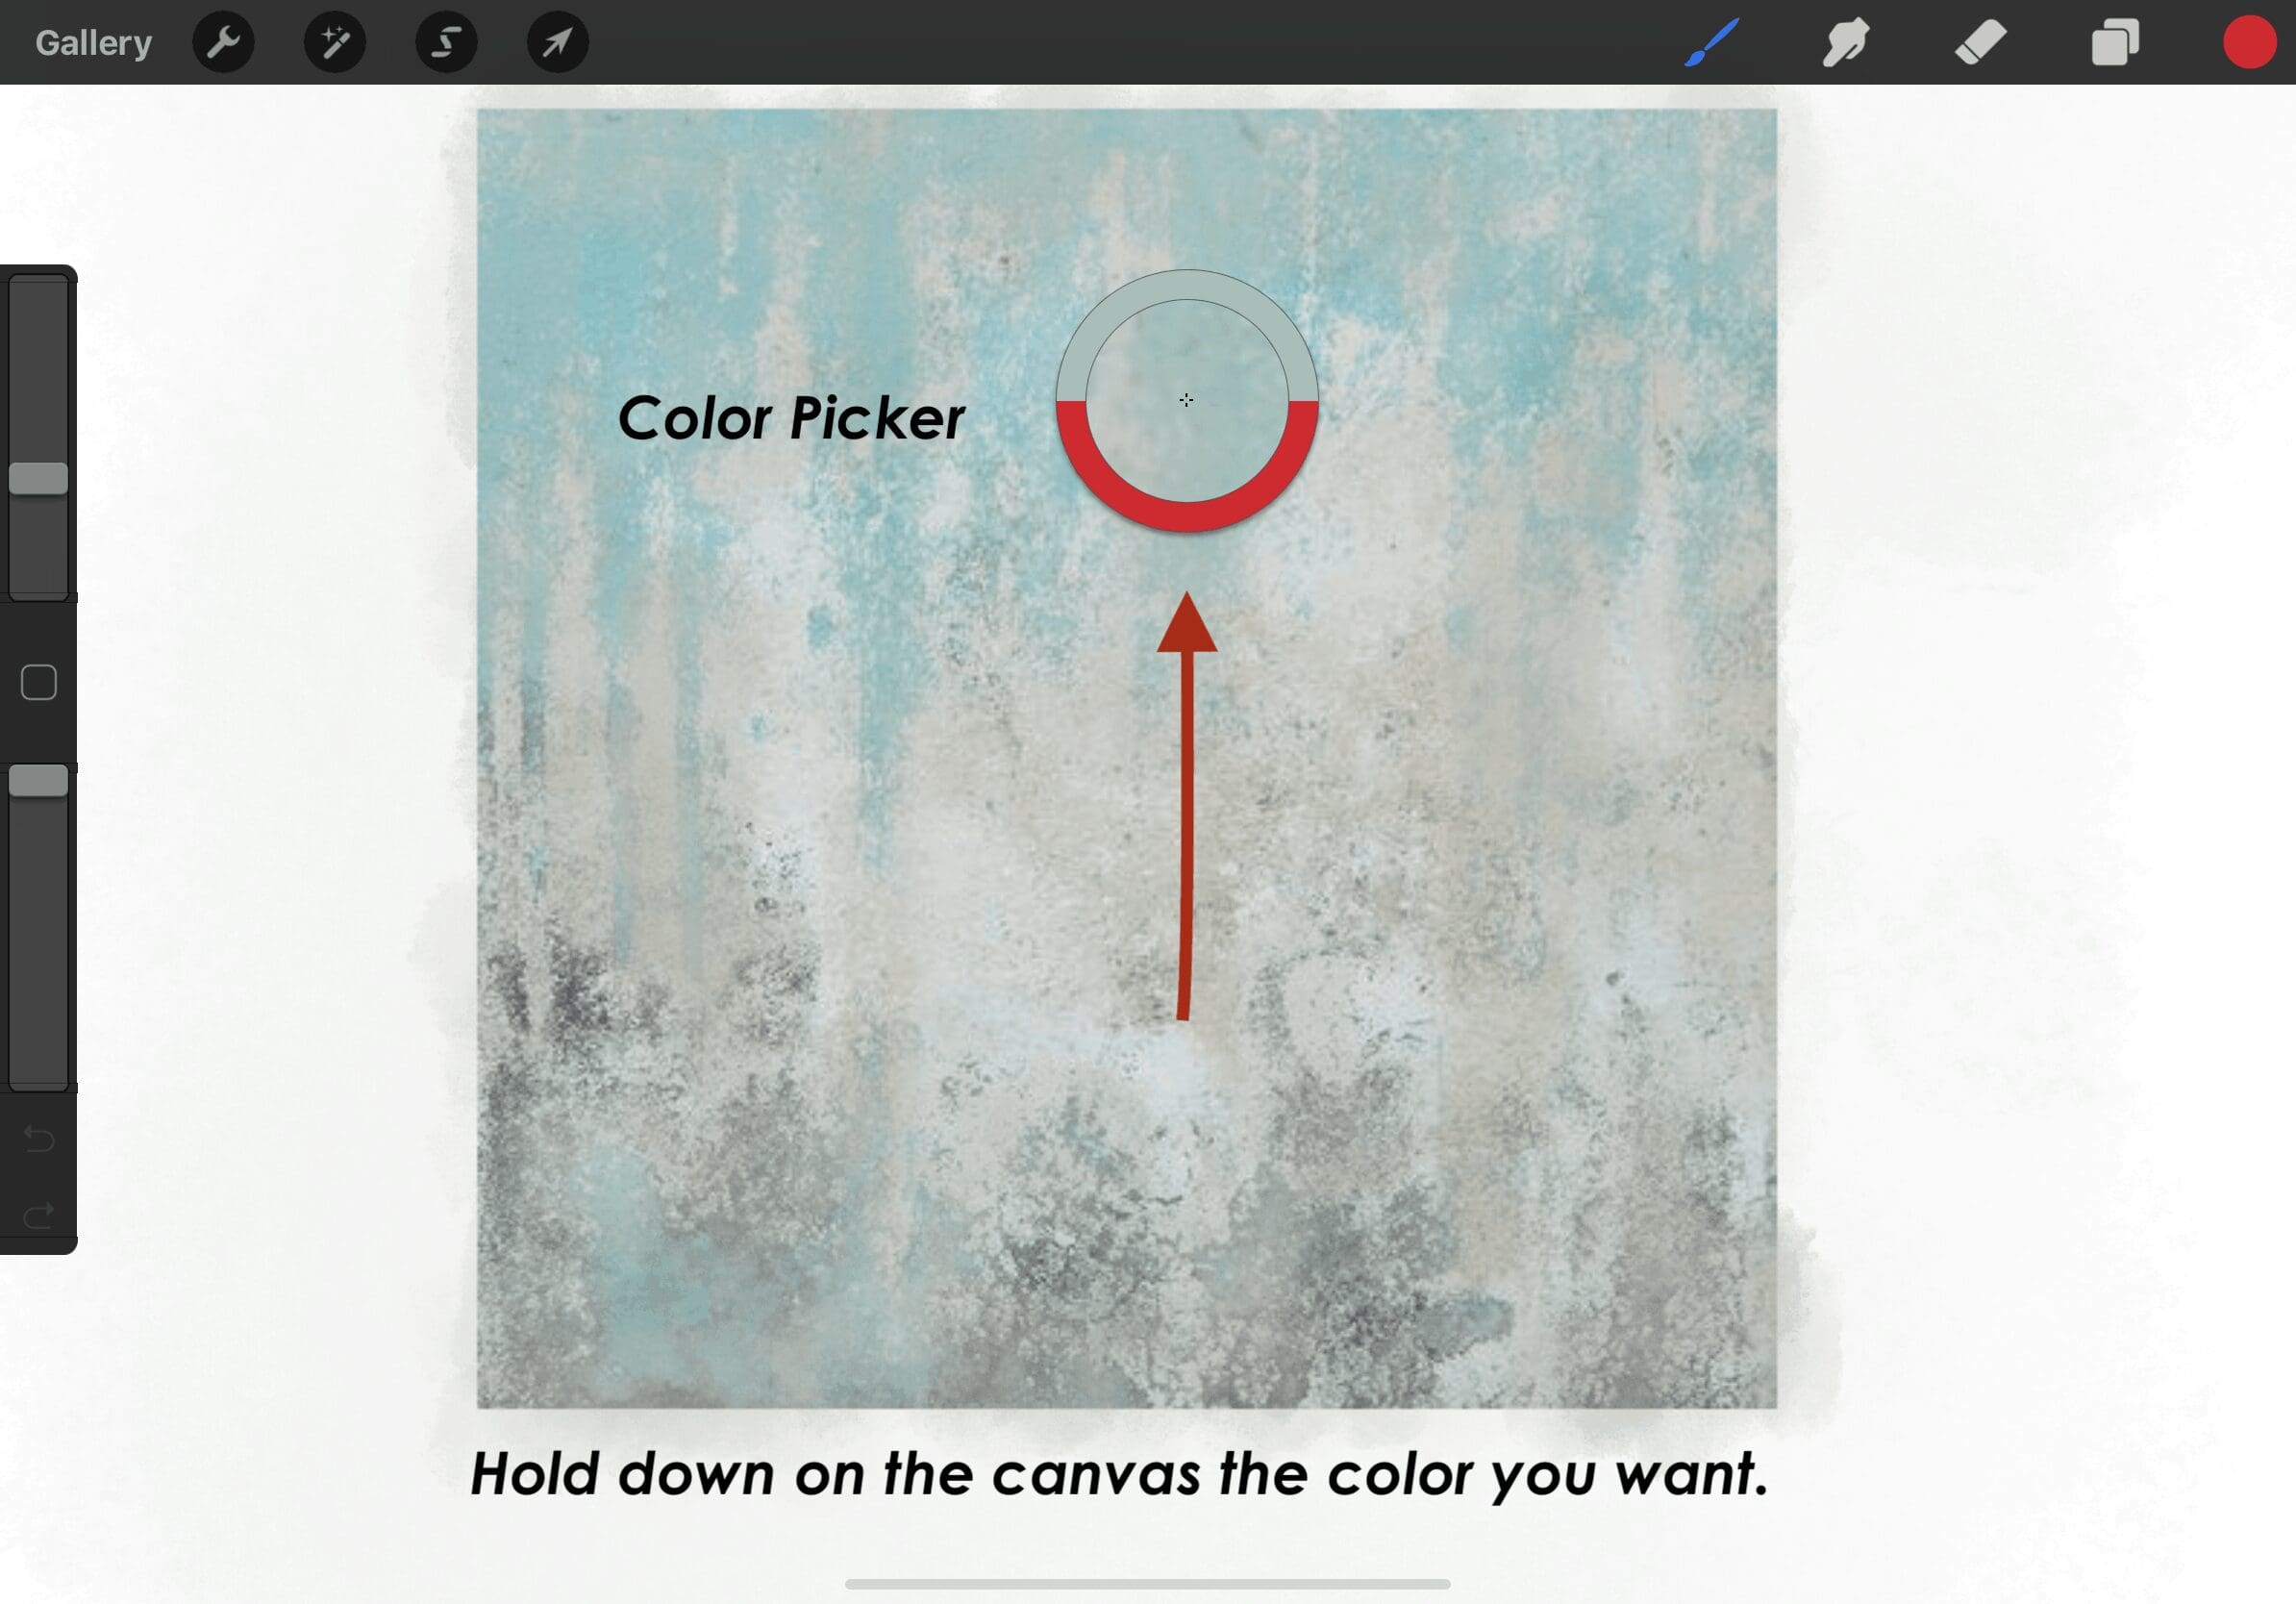
To use the color picker or the eyedrop tool, you need to hold down on the color that you want to specify. You can hold down using your pencil or your finger on the color.
For people who have worked in other programs like Photoshop or Illustrator, it may be a little bit confusing to understand where the color picker or the eyedrop tool is when using Procreate. This is because there is no icon or any way to know about the tool unless you are told about it.
You will see a circle show on the canvas to show what color you are now picking. If the color looks correct, then simply release your hand to specify the color, and you will see the color in the circle on the top right-hand side of your screen.
The bottom color, which is, in this case, red, was the color that I had readily used for my color palette. You do not need to worry about this color as it may show up, but Procreate has still specified the color I have pressed down on.
Tip 2: Use Your Finger To Pick The Color
I have found using my finger on the canvas to be a much easier way to be able to find the color. Some people like to use the Apple pencil, but I have had better luck using my fingers to specify colors than the Apple pencil.
Maybe this is because I can hold down a bit harder with my finger to ensure the color picker does come up. But if you’re more comfortable or adapted to using an Apple pencil, then by all means, do use the pencil to pick the colors.
Tip 3: Move your Finger Around the Canvas to Find the Exact Color
Sometimes, when you press the color, you may think it is correct, but it is not. This is especially true if your canvas has a lot of shades of color.
I have found that many times, I need to move my finger around the canvas to be able to find the color that I want to specify. This is also another reason why I prefer to use my finger, as I find it is much faster and easier to use my finger to specify the color.
The color will only be specified when you take your finger off the canvas or off the screen. If you do not take it off but continue to hold it, it will not specify the color and will move onto another color where you have moved your finger.
Tip 4: Keep Your Eye on the Circle and The Top Corner
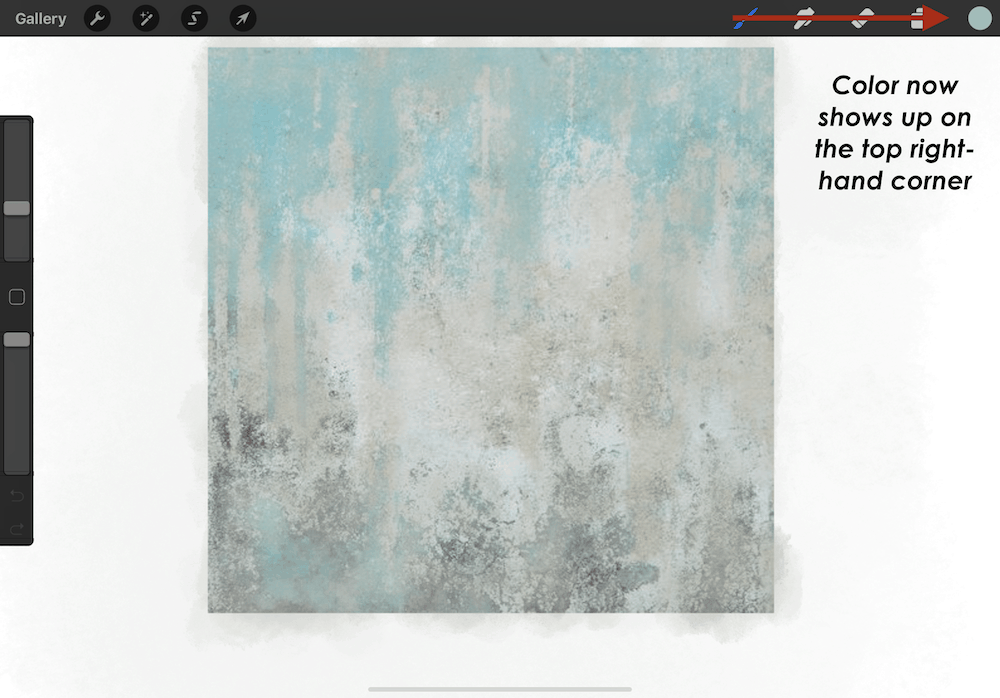
One of the easiest ways for you to see what color you are specifying is for you to keep your eye on the color picker circle to see which color is now being picked. This is especially important if you are working with a canvas that has many shades of colors as this canvas I am using as my example.
I have found the easiest way to keep an eye on the color is to check the color picker circle as you are moving your finger around. As soon as you find the color that you want, then take your hand or pen off the canvas, and the color will show on the color picker at the top right-hand corner.
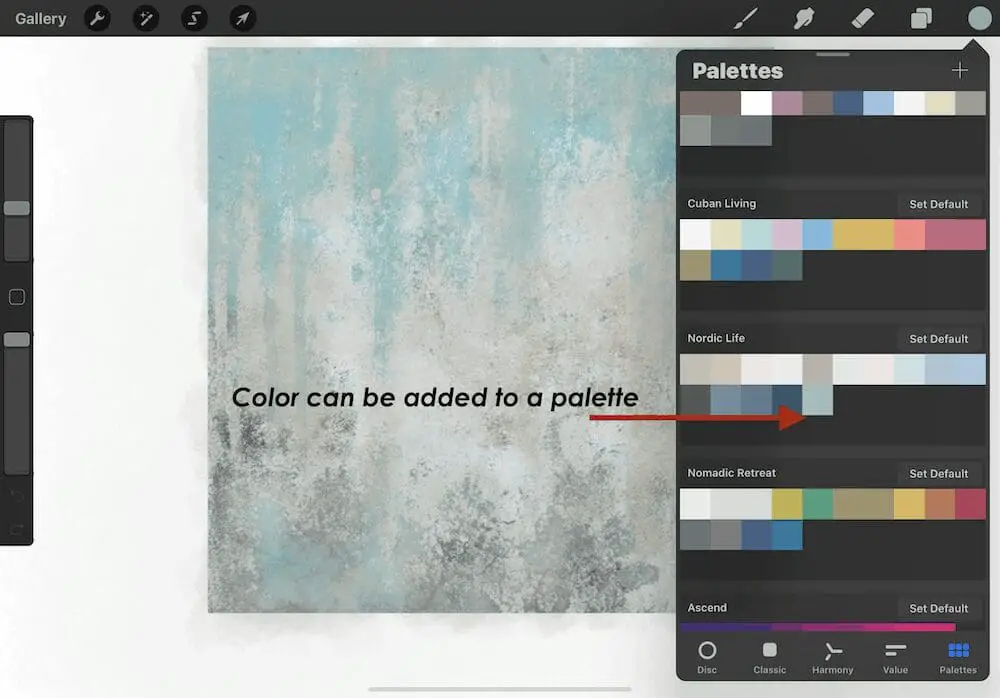
Tip 5: Add The Color You Picked to a Palette
Once the color is on the color circle in the top right-hand corner, you can either add the color to a palette or use the color immediately. Especially if this is a color that you may want to use again for another project with Procreate.
Procreate does keep some history of some of your colors, but I suggest that you save the color once it has been specified so that you will not have to try to find it again or to specify it again. You can always delete the color from a palette if you choose, but it is much better to have it on a palette than to try to specify it again.
Many times when I am working with many different colors, and I am not sure precisely which color is correct, I may specify several colors and put them all on a pallet next to each other so I can see exactly which shade or which color I want. It is very easy to delete colors off a palette or to move the colors of a pallet around.
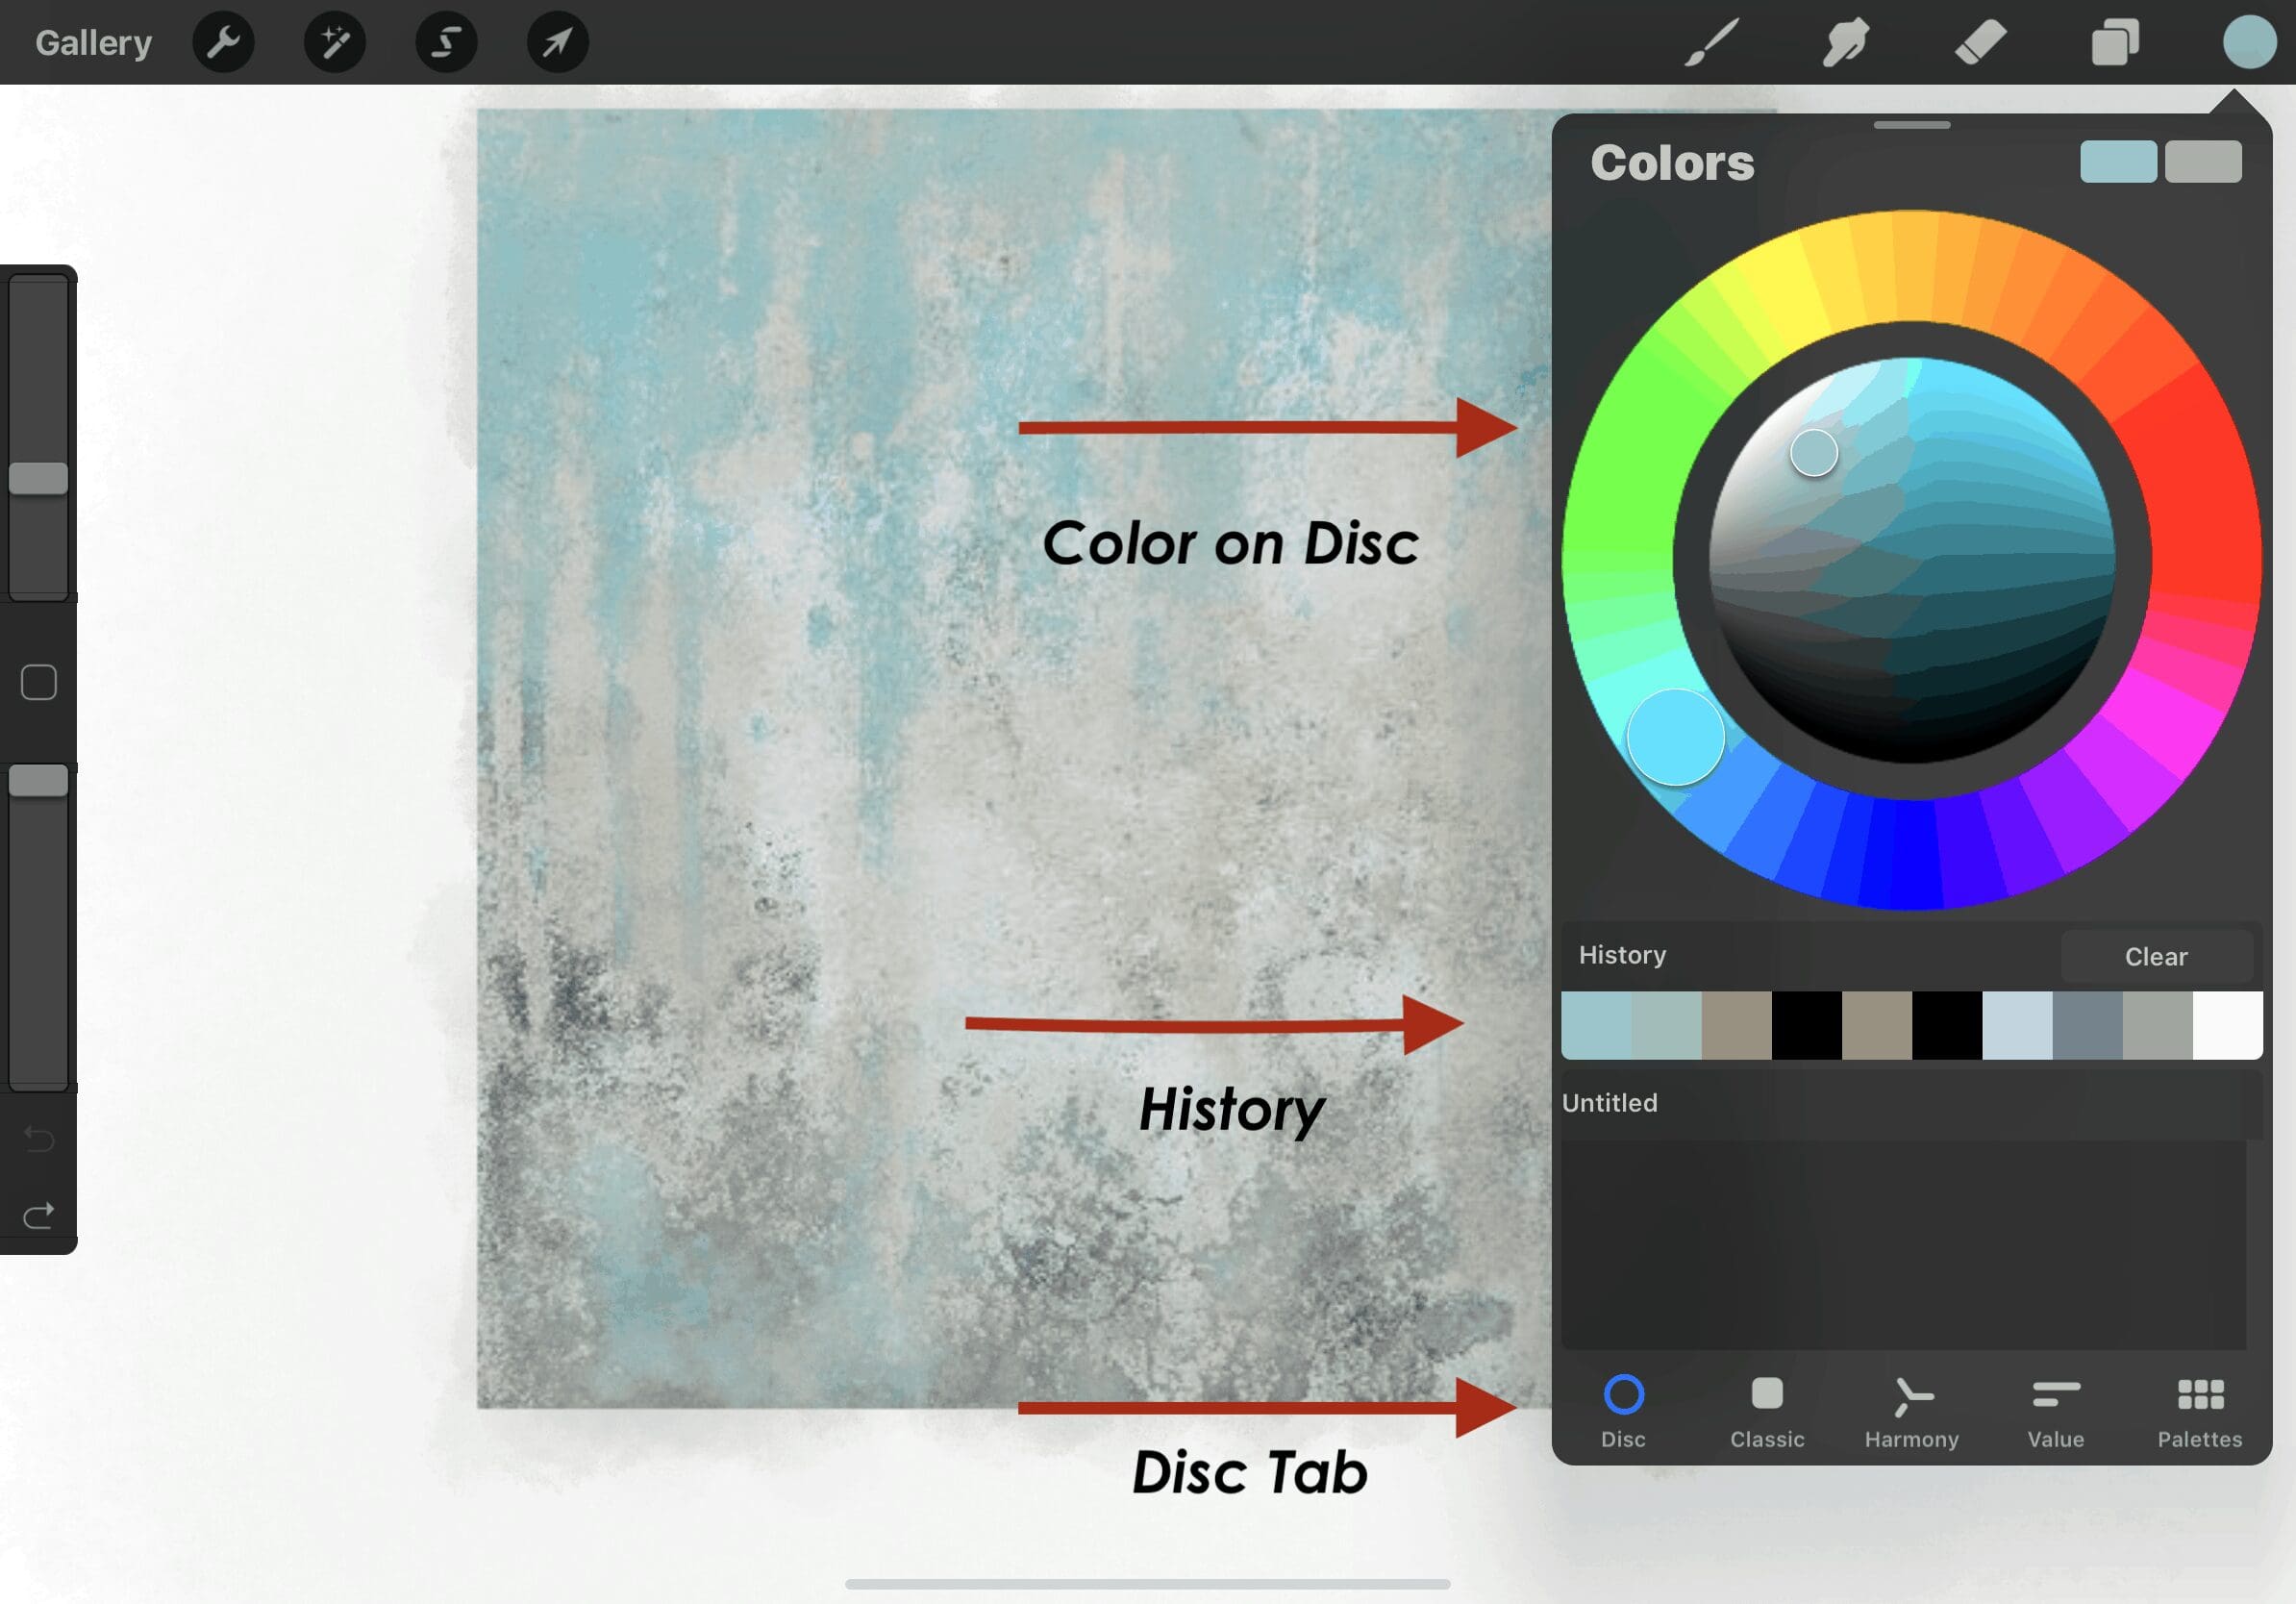
If you do happen to forget to save a color to a palette, you can go to the Value, and under History, you can see if the color is there under the history section. Procreate will keep these colors for you for a while, but they may not be there long-term, so we suggest saving them on a color palette if you need them.
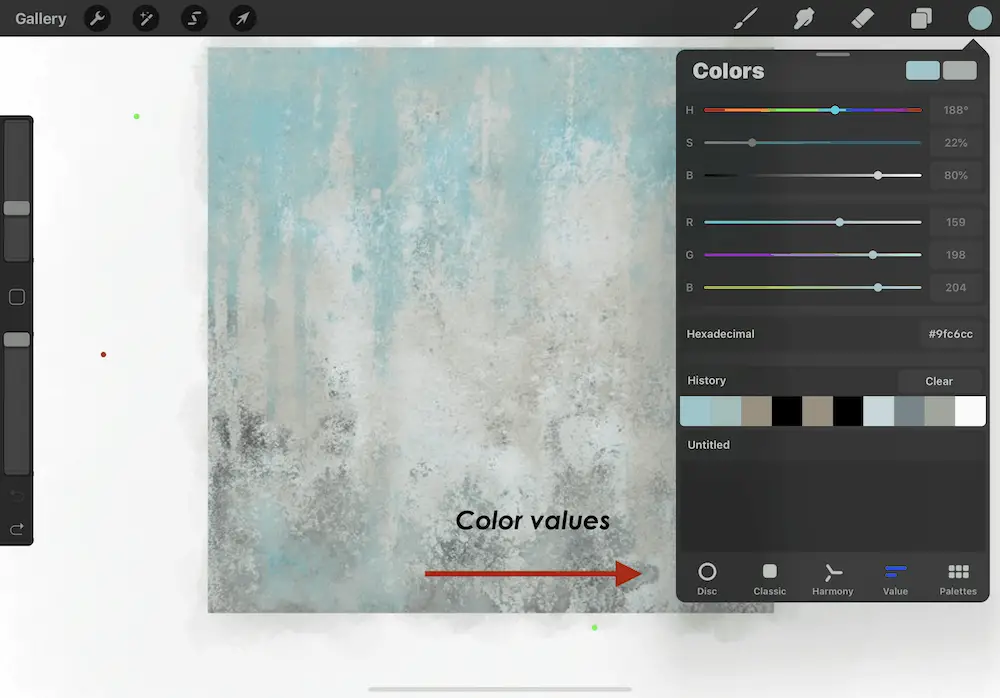
Tip 6: You Can See All The Color Values In Procreate
We use procreate to help us find the specific values of colors. For example, when you pick a color from a photo or a canvas, Procreate will show you some of the values for that color.
Here are some values Procreate will automatically show you for each color:
- HSB and RGB Value and Hexadecimal – Under the value section, you can easily see the HSB, RGB, and a hexadecimal value for the color. It will only show the value for the colors that are already specified in the top circle.
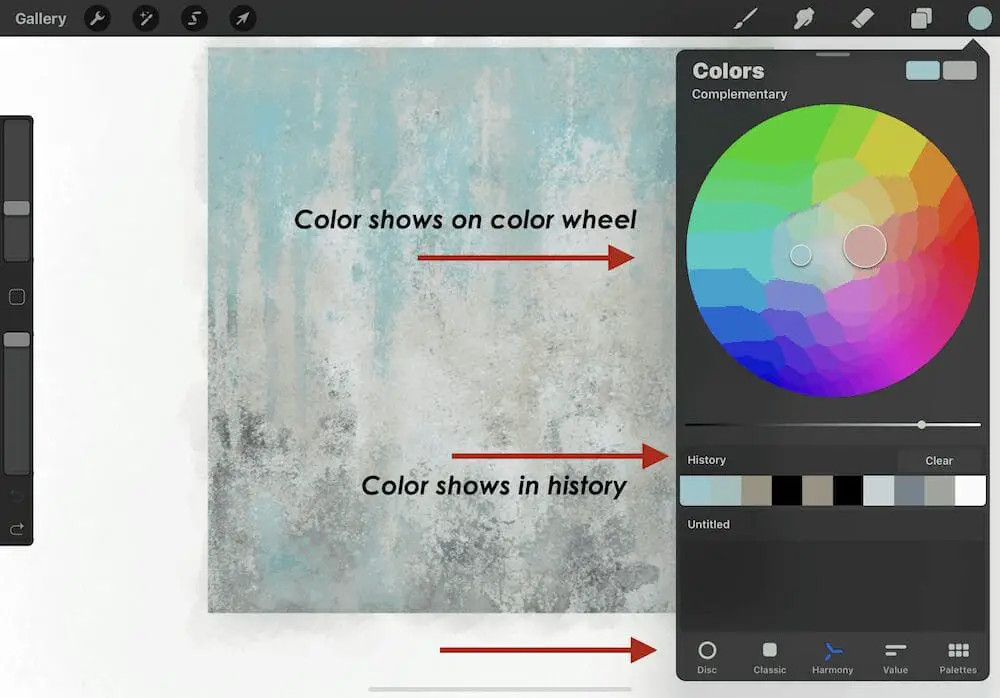
- Harmony View – When you check the harmony tab, it will also show you some complementary colors for your color. If you want, press on the complementary color and add it to a palette.
- Classic View – Under the classic view, you can see where the color is and all the other colors surrounding it. You can move the bars underneath the bottom section of the color if you want to be able to change or adjust the color in any way.
- Disc View – Under the Disc View, you can see where the color is on the color wheel if you prefer to work with the color wheel to adjust the color.
We use these color values quite a bit in a lot of our design work. For example, suppose I am looking for a specific color for Adobe Illustrator or Indesign, and I want to know the hexadecimal value for that color. In that case, I may input that color into Procreate and use the color picker to find the HSB, RGB, and hexadecimal values for that color. We find this color picker or eyedropper tool as a very easy tool to help us discover the values of a color.
The color picker or the eyedropper tool is very easy to use with Procreate if you know how to use it. But one of the issues is that it is not a tool you readily know about unless someone has shown it to you or you have read about how to use it, even though it is a tool that everyone should know about who is using the Procreate App.
Find out more about how Mondoro can help you create, develop, and manufacture excellent home decor and furniture products – don’t hesitate to contact me, Anita. Check out my email by clicking here or become a part of our community and join our newsletter by clicking here.
Mondoro gives out a FREE Lookbook to anyone interested. You can receive a copy of our latest Lookbook by clicking here.
Listen to our Podcast called Global Trade Gal. You can find it on all major podcast platforms. Try out listening to one of our podcasts by clicking here.
Subscribe to our Mondoro Company Limited YouTube Channel filled with great videos and information by clicking here.
Related Questions
How To Create a Background For Procreate?
In Procreate, the easiest way to cut out the background is to use the erase tool to erase off or cut out the background you do not want. This Procreate eraser tool will work the same as if you had a regular eraser to erase something you do not want on paper. To erase the background, you should crop the image as close as possible so you have less background to erase. Then you can erase the background you do not want by using the eraser mode on Procreate.
You can find out more by reading our blog, Procreate – How to Cut or Erase a Background In Procreate by clicking here.
How to Use The Clipping Mask Function On Procreate?
The clipping mask function on Procreate allows the top layer to be clipped or cut to the exact same size and shape as the bottom layer. This function allows you to see in more detail how a product will look when completed. First, you must ensure the photo or file you will import is prepared properly. Then you must complete the product design while being sure to layer and fill in each layer with color. Once the design is completed, you are ready to do the clipping mask and clip the top layer to the bottom layer.
Find out more about the clipping mask function by reading our blog 4 Easy Steps to Using the Clipping Mask Function in Procreate by clicking here.